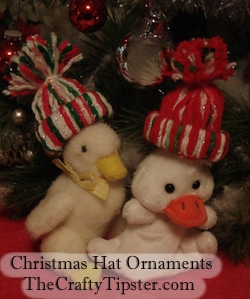
 When I first saw these cute little hats, I knew I had to make one. There’s no sewing, no glue and you don’t need any special equipment or fancy supplies – well, you will need empty toilet or paper towel rolls, but who doesn’t have at least one of those?
I’ve been seeing them here and there on other craft blogs. I tried to find the earliest post to give credit where credit is due. The best I could find was a 2008 Craftster.org forum post from Jennifer Anderson, aka littlebiskit. She provided a nice tutorial but also mentioned having made these yarn hats as a child and referred to other online tutorials. So, I guess I’ll just add my two cents to this project and share it with you in case you haven’t seen it before.
This is a great project for the whole family. My Mom, the older one who hates fussy craft projects, and I gave this a go and we both ended up with super cute Christmas yarn hat ornaments. They do tend to use more yarn that you might think by looking at them so pick a yarn based upon what your stash and your budget will allow.
Christmas Yarn Hat Ornaments
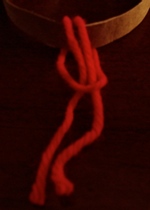 Cut a round off of the cardboard tube about 3/4 of an inch wide. (If the layers of the tube come a little loose, glue the edges down before making your hat.)
Cut a number of lengths of yarn for your hat. Mom used 12 inch lengths. Mine were just under 11. Both led to quite a bit of waste. I would recommend trying 10 inch lengths. Since it doesn’t matter if each length is exactly the same (they should be close though), just wrap the yarn around something and cut it into segments that way.
If you have ever made a latch hook rug, the next step should be familiar to you. Fold a strand of yarn in half. Push the loop up through the middle of the cardboard ring and slide the two tails into the loop to attach the yarn to the ring. Your hat will turn out nicer if you make all of the ‘knots’ the same way.
 Squish the yarn along the ring to ensure you completely cover the ring.
Once you have yarn all the way around the ring, slide the yarn up through the middle of the ring. (The ‘knots’ should be at the bottom.)
Comb the yarn with your fingers to make it hang flat and even.
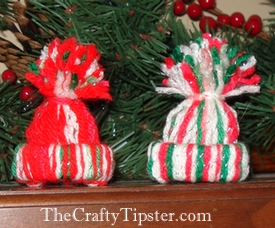
Using a new piece of yarn, tie the yarn about an inch or so above the top of the ring. Trim and shape the yarn to form a nice pom-pom for your yarn hat ornaments.
Don’t they come out cute? I’ll warn you, they’re a bit addictive too. LOL
