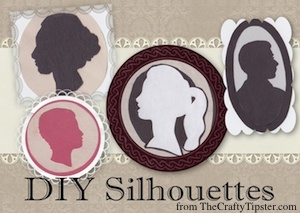
 Don’t you just love old silhouettes and cameos? Long before photographs or photos on cell phones, earlier generations were happy to have a hand-cut silhouette to remember their loved ones by.
From running two vintage image websites (Free Vintage Art and Reusable Art), I know that people are often looking for coloring images. Good ones are quite hard to find. Most of the recommended techniques generate images that are somewhere between mediocre and useless.
The past few days, as Valentine’s Day draws closer, I’ve seen a few mentions to an old article on a television news website. It mentions a local artist who provided a crafting magazine with several pre-drawn silhouettes to download and craft with. You won’t need them. We’ll be making our own.
An idea is born…
Those failed techniques for making coloring images could be used to create a silhouette? It could be of someone we love or some random photo, drawing or painting we’ve found online. With some trial and error, I have what I think is a fairly simple and easy method for turning any portrait taken in full profile into a simple silhouette.
Tools Needed to Make Your Own Silhouette
1. A basic graphics editor program. On my PC I like Irfanview. It’s free and does more than most basic editors – a wonderful tool worth far more than you will pay for it. On my new Mac, I’m unfortunately still hunting for something to use instead.
2. A very sharp scissors that comes to an extremely fine point. If you can work well with an art knife, that should work as well. Of course, if you have a Cameo or Silhouette or one of those other fancy cutting tools, you could use that instead. Hope springs eternal that Santa might bring me one, one year.
3. A basic printer.
4. Glue, paper, ribbons, beads and whatever else you might want to embellish your silhouette or cameo with.
Choosing the Right Image for Your Silhouette
 Selecting the right image is the most important part of this process. Keep in mind that only the edges of the silhouette will define the facial features. You want to choose a picture that is in full profile where the nose, lips and eyebrow are fairly well defined. It also works better if the neck is exposed – meaning long hair should be in a pony tail or some sort of up-do or bun. Once you get more familiar with the technique, you could probably get more clever with hairstyles.
While this works, to varying degrees with any image, if the skin tone is similar to the background it is going to be harder for the graphics program to find the edges of the facial features.
The process of creating the silhouette does tend to make the person less recognizable. I bring this up because this may be a project where you can utilize “found” photos. Three of my example pieces used found photos – one of the ladies is even quite famous. (I would be curious if anyone figures out who she is.)
Try to not infringe on other people’s copyrights, particularly if you will be using your silhouettes publicly.
The example used in this tutorial is a vintage photograph that I hope is out of copyright.
The round mat also made it far easier to create the base and frame for the silhouette.
How to Make Your Own Silhouette or Cameo
First I took the original photo and cropped it to size.

 Then I turned the photo into a negative. (Select all channels if you are given the option.) You should see something like the photo on the left.
Then I used the photo effect called edge detection. You should end up with something like the photo on the right.
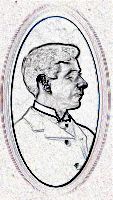
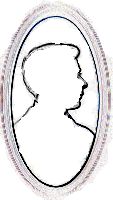 Next I took the photo and made it a negative a second time. You should see the edges of the face clearly.
Capturing the oval from the original mat made it far easier to create an appropriately sized frame.
Use the brush or eraser tool to get rid of most of the excess bits of color and background. This step is optional, I do it to save on ink costs.
Print your silhouette and start cutting along the outside of the printed lines.
Note on printing: Without a cutting machine or expertise with a knife, I have found that printing the image onto plain copy paper generally works best. My scissors didn’t make nice clean cuts on even a light-weight card stock.
Creating Your Own Silhouette – The Cutting
You might have things that work better for you, but this is what I’ve been doing.
1. Cut away any excess paper so you just have the picture to work with.
2. With this image, I cut the outside of the oval frame first. Then I worked on the inside of the frame.
3. For interior areas, rub the point of the scissor on a part of the image that will be removed. By gently rubbing the point on the paper, it will create a hole to insert the scissor without bending or creasing the paper.
4. I tend to make a small cut into the corners, like the middle of the lips. As I work around the lips and come to the cut, it will hopefully pop right off when the cuts meet. Make little snips when the cut isn’t completely clean. Don’t tug on them, it rip the silhouette or leave a rough edge.
5. From time to time, look at the piece form the back. This will help you spot places where the cut is too square and should be rounded off.
6. There will be little ridges on the back side on some of the cut lines. Use a fingernail to gently iron them out.
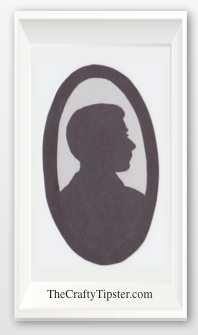 After I cut out the silhouette, I glue it onto another piece of paper. This adds a little depth and makes the piece stronger. On my silhouettes, I smeared a bit of glue stick on a piece of construction paper and laid the silhouette into the glue – much easier than trying to ensure the nose and other small protrusions get glued.
Using the original copy paper silhouette as a guide, trim the construction paper away.
(There might be a quicker and easier way to do this in one step but I haven’t figured one out where it ensures nice, crisp cut lines.)
Then comes the fun part, decorating you silhouette. You could use various papers, ribbons, beads, or whatever stuff you have to decorate your silhouettes. Give a lady a pearl necklace. Give a gentleman a white collar and/or tie. I left mine fairly simple. That’s what makes these so fun, you can truly make them your own.


Wow. These would be great for lockets.