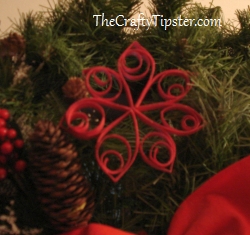
 After working on adding the Quilling section to Crafty Tips, I had an idea for a great family Christmas craft project – an easy to make poinsettia ornament out of construction paper.
This Christmas craft project can be as fiddly or simple as you wish. Let the paper decide how it wants to lay or use a bit of glue to tack down the coils to create a uniform appearance.
It’s made using quilling techniques, construction paper or copy paper, 3 pencils, a paper shredder that strip cuts and a bit of glue (I used glue stick).
Using a bit of waxed paper will also help to keep your flower petals from sticking to your table if you get a little too much glue on them.
This is a good project to use up partially used or semi-damaged sheets of construction paper. I used my trusty paper shredder to make 1/4 inch wide strips about 12 inches long. It doesn’t matter how long you make them, but I suggest at least 8 inches to get a nice sized flower ornament. (If you don’t have a shredder, you could always cut your paper strips by hand.) Once you understand the construction of the flowers, play around a bit with paper widths and lengths to create a variety of flowers, snowflakes and other objects.
Yes, I hear the quilling crowd groaning at this point. Yes, I know the edges of the paper will come out a bit ragged looking. Yes, I know that I’m not using true quilling techniques. Let’s just consider my Christmas ornaments more craft and less art and move on. 😉
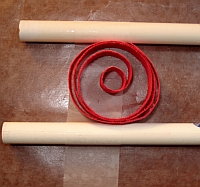 Here’s where the pencils come into play. It will make life easier if you have three, un-sharpened pencils of the same kind. Trying to keep them evenly spaced all the way across, tape two of them down onto your waxed paper or work surface like I’ve shown here.
The purpose of the pencils is to ensure that your petals will all be the same size. I didn’t use this little trick with the original poinsettia ornament I made and the petals came out all different sizes.
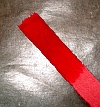 Moisten about one inch of one end of the paper. You could dip it in water but being honest, I just used my mouth to moisten the paper. (Moistening the paper will make it easier to roll and help it to hold it’s shape but it is totally optional.)
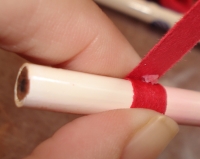 Tightly wrap the paper around the third pencil near the end that gets sharpened. The dye in the paper stained my pencil pink – so don’t use a favorite.
After going around about 1 and a half times, put a small glob of glue stick, paste or liquid glue on the paper. Be careful to not put too much or you will end up gluing your petal to the pencil. (with the flower shown at the beginning of this tutorial, I didn’t glue the central coil which created a more loosely shaped petal)
 Continue wrapping the strip of paper tightly around the pencil. (This takes a bit of practice but try to make the coil as even and tight as you can. You may have to wiggle and readjust it as you go along.) Give the coil a good squeeze, wait a moment or two to let the glue set and slide it off the pencil while holding it tightly to maintain your coil.
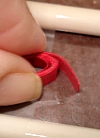 Drop it into the space between the two other pencils, like shown in the picture and allow the coil to unwind to the width of the space. This will ensure that your petals are the same size. Carefully remove the coil from between the pencils and glue the end down (glue only about 1/4 of an inch). Be careful not to get glue on the inner layers or you’ll have trouble with the next steps.
Pinch the end of the petal so that the end of the paper ends at the point. That will help ensure a more neat and tidy appearance.
Holding on to the inner circle, turn the rest of the petal in the same direction of the coil. The idea is to make the layers separate. Using a toothpick, insert a bit of glue between the layers to create a more interesting petal where the inner loops are at the opposite end of the pinched point. Avoid gluing the outter-most two layers together, otherwise you won’t be able to make a pointed petal.
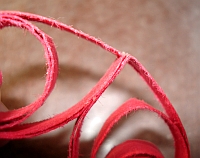 You can make these flowers with either 5, 6 or 7 petals.
Once you have all of your petals made, now we’re going to glue them together. Take two petals and make a one inch smear of glue starting at the pinched point of one of the petals. Match the pinched points of the two petals and carefully compress the seam with your fingers. While the glue is still wet, lay the petals on the waxed paper to ensure they are aligned and your flower remains flat.
Continue adding petals one at a time to the glued petals.
When you reach the last petal, attach one side at a time. Trying to glue both sides at once will make it much harder. The fewer petals, the easier this step will be but your flower will also be smaller. Make the first few poinsettias with fewer petals to get the hang of it and then increase the number of petals as you get more proficient.
Once all of the petals are glued together, you can pinch the outside loop of each petal to create pointed petals like poinsettias have.
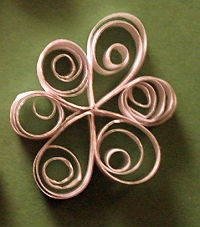 This technique works even better with standard weight copy paper. The coils retain their shape better without having to glue the inner layers to each other. This snowflake was made without the pencil guides to ensure every branch was the same size. I intentionally made the top and bottom branches of my snowflake longer to create a less flower-like appearance.
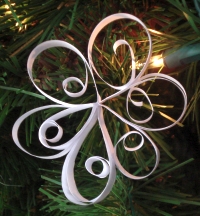 The snowflake on the right was made using shorter strips of paper but the same basic design as the one on the left.
Attach a bit of string to the ornaments to hang them from your Christmas tree or use as Christmas gift decorations. You could also leave off the string and simple lay them onto the branches of your tree.
Please let me know if you have any questions. I’d also love to see what lovely poinsettias, snowflakes and other Christmas ornaments you make from this tutorial.
