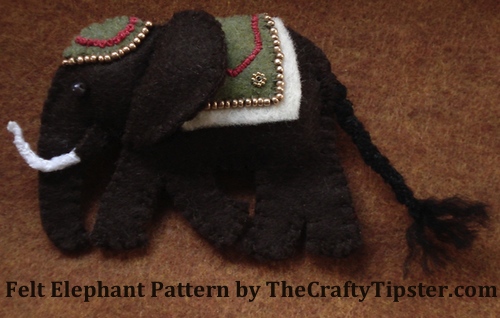
 A few days ago, I mentioned our great elephant challenge. The idea was that Mom and I would each take the same elephant drawing and create our own version of it to make felt brooches.
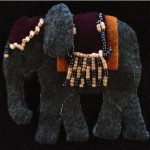
Today I’ll be sharing how they turned out and the pattern for my elephant. In another post, I’ll share with you Mom’s pattern.
We thought with the blanket, even if we made very similar elephant patterns, how we beaded or embroidered the blanket and little hat would make each of our projects unique.
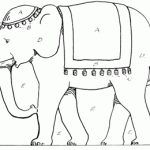
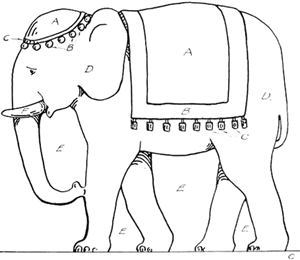 As a reminder, here’s what the original looked like…the original drawing had somewhat small ears – like the Asian elephants do, a small tusk and a partially hidden tail. When I removed all of the details to get an outline for the body, I didn’t like the way the legs looked – either I would have to embroider the splits or redesign the legs. Mom embroidered, I redid the legs.
The second major change I made was to make the trunk longer. It needed a bit of changing to separate it from the leg anyway and I thought a longer trunk would balance the piece better.
I like tails. I think that so often the personality of an animal is shown by how they use their tail. I added a more prominent tail to my felt elephant.
The blanket and hat. We could have also used just one piece for the blanket and embroidered it to look like a rug or we could have embroidered directly onto the elephant. Again, the idea was to see how differently we could interpret the same pattern. Both Mom and I opted to use contrasting felt colors to make the blanket and matching hat but the we decorated them quite differently.
Supplies
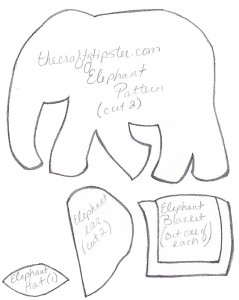 2 pieces of felt approx. 3.5 x 3 inches for the elephant body
2 pieces of felt approx. 1.0 x 2.0 inches tall for the elephant ears
small pieces of felt for the blanket and hat
1 bead for the eye (can be switched for an embroidered eye, safety eye or felt eye)
2 5 inch lengths of 4-ply yarn for tail (use yarn where the ply’s can be separated)
1 3 inch length of 4-ply yarn for tusk (use yarn where the ply’s can be separated)
sewing thread and embroidery thread
beads (optional)
a small amount of stuffing (optional)
good scissor for cutting in tight areas (the Westcott 5″ Titanium Straight Scissor with Microtip is my favorite)
felt elephant pattern from TheCraftyTipster.com (click on pattern for printable, full-sized version)
Felt Elephant Pattern Instructions
1. Cut out the felt pieces. Reserve scraps from cutting out your elephant ears and body for tusk.
2. Blanket stitch ear pieces together.
3. Embroider and decorate blanket. If using two pieces, like I did, embroider the smaller pattern piece onto the larger one. Once you have finished adorning your blanket, sew to one of elephant body pieces. (My blanket was attached with hidden stitches among the gold beads which left the edge of the blanket loose from the body.)
4. Embroider and decorate hat. Attach hat to elephant body, the same time you are embroidering it.
5. Add your eye; I used a single bead.
6. Attach the ear.
7. Take the two pieces of 4-ply yarn for the tail and fold them in half. Using matching thread and a sewing needle, sew through and around the yarn to make a sort of bundle of the four lengths of yarn. Leaving a bit of the loops free will make it easier to attach your tail to your elephant. When you get about 1/4 of the way along the tail, cut off one of the four pieces of yarn. Stitch carefully so the cut end is blended and doesn’t stick out anywhere. Continue working down the tail, removing a ply of yarn as you go along. Keep removing yarn as you stitch down the tail until you are left with 3 or four strands. Fray and separate the yarn at the bottom of the tail to create the tuft.
8. The tusk is made the same way except you won’t be making the tuft. It does get a bit fiddly as you get closer to the tip of the tusk but I think the look is worth it. Once, you have made the graduated shape of the tusk, work your way back to the base of the tusk. About mid-way, pull the threads from one stitch to another a little tighter to create the curve in the tusk.
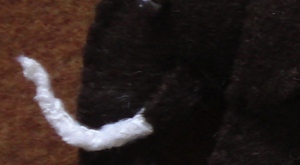 9. Take a small piece of the reserved felt from when you cut out the body and use it to cover the base of the elephant’s tusk. Wrap it around both sides to add a bit of strength for when you attach the tusk to the body and to make it look more like it is coming out of the elephant rather than just attached to it. (I took a skinny piece and folded it over the top and then stitched it down both sides and over the tusk.)
10. Attach the pin to the back piece of the elephant. Use a small rectangular piece to cover the pin back. It gives a more finished appearance and adds some strength so that your felt elephant won’t rip from use.
11. Use a buttonhole stitch to join the two elephant pieces. I started just behind my ear to hide the ending point better. When you get around to the tail position, firmly sandwich the tail between the elephant pieces.
12. Add a bit of stuffing, if you would like, to give your elephant a little more dimension.
13. Sew on the tusk. Stitch the felted covering to the elephant; leaving the uncovered tusk loose from the body.
14. Show off your great new elephant brooch and tell your friends that you found the felt elephant pattern at TheCraftyTipster.com. (Send me a note and a picture of your completed elephant and I’ll feature your brooch here.)
15. Pin and otherwise share this post so everyone you know can make their own elephants.
If you have any questions or problems using my felt elephant pattern, just let me know and I’ll try to offer suggestions.

Can’t wait to make one. Thank you for an elephant idea that doesn’t use pastels and children’s colors. One of my blazer’s is screaming…Make me an Elephant!
Agree with Sarah. A feltie for adults. yay