The buttonhole stitch is used for both buttons and some of the finest ornamental cut work embroidery designs. It is both ornamental and functional, making it a must have stitch in any embroiderer’s arsenal.
How To Sew A Button Hole Stitch
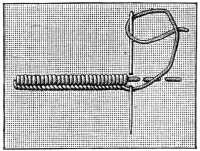 The button hole stitch is constructed by making the same stitch as the blanket stitch only with the stitches made side-by-side allowing for no fabric to show between the upright portion of each stitch.
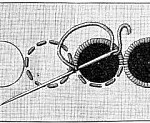
In the example shown on the left, the stitch is worked over a base row of running stitch to create a raised line of stitches.
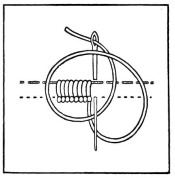 The button hole stitch is the stitch worked over fabric where a button hole is needed typically leaving a small space of one or two warp threads of the fabric. Once the stitches have been completed, the warp thread(s) left unworked are carefully cut and removed. The tight and solid nature of the stitch creates a finished edge to slide the button through and prevents the fabric from fraying.
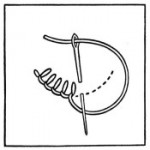
The stitch shown to the right is known as the tailor’s buttonhole stitch. This variation of the buttonhole stitch is stronger and more decorative than the basic buttonhole stitch due to the added knot created while making each stitch.
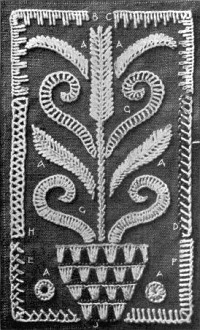
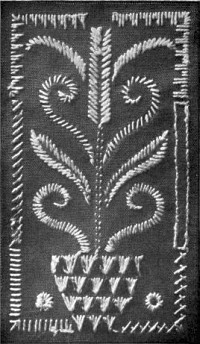 On the left is a vintage sampler created only using buttonhole stitches.
They varied the stitch lengths and directions to create light and dark areas of stitching as well as decorative edges.
The back of the sample has been provided to help you be able to see how the stitches are constructed and to be able to duplicate those buttonhole stitches used.
Buttonhole stitch A – the stitches are simply worked in the form of a wheel to create the rosette shape.
The buttonhole stitches labeled B & C simply differ in the stitch lengths used and the patterns created by varying the lengths of each stitch.
Stitch D was not fully explained by the original author but it appears to be a row of buttonhole stitches worked on a slant with a row of small running stitches along the open end of the buttonhole stitches.
Stitch E was made by making a buttonhole stitch sloping to the right and then a smaller buttonhole stitch sloping to the left.
Stitch F was made using the tailor’s buttonhole.
I’m not entirely sure how the G & H stitches were made, so I’ve just copied word-for-word what the original author had and included the one illustration she had included for buttonhole stitch H…
In order to make your ladder-stitch (G) square at the end, you begin by making a bar of the width the stitch is to be. Then, holding the thread under your thumb to the right, you put the needle in at the top of the bar and, slanting it towards the right, bring it out on a level with the other end of the bar somewhat to the right. This makes a triangle. With the point of your needle, pull the slanting thread out at the top, to form a square; insert the needle; slant it again to the right; draw it out as before, and you have your second triangle.
The difference between the working of the lattice-like band at H, and ladder-stitch G, is that, having completed your first triangle, you make, by buttonholing a stitch, a second triangle pointing the other way, which completes a rectangular shape.
Buttonhole Stitch, Cutwork & Venetian Embroidery
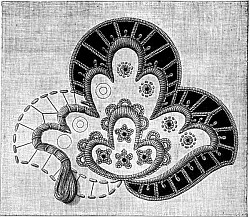 Venetian embroidery, when completed, looks quite similar to lacework. Areas where the fabric is not removed are filled with decorative stitches. Padded buttonhole stitches are worked on the edges of the areas to be removed – the black areas in the example.
You may notice that several of the buttonhole edges have little loops, those are called picots.
Cutwork and Venetian embroidery are beyond the scope of this tutorial but we may revisit them at a later date if there is enough interest.
Renaissance Embroidery
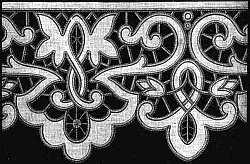
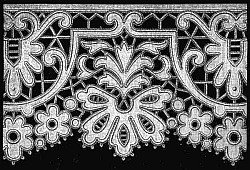
Renaissance embroidery is a type of cutwork embroidery where the only stitches used are buttonhole stitches. While the connecting bars are left free of ornamentation, picots are sometimes added to the edges of the piece.
Richelieu Embroidery
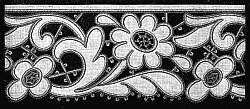
Richelieu embroidery is cutwork where the connecting buttonhole stitched bars are ornamented with picots.
Madeira Embroidery
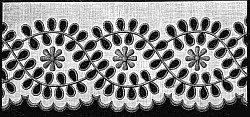
Madeira embroidery is also worked primarily in buttonhole stitch and consists chiefly of eyelet holes. Many of today’s trims and edgings on curtains and clothing are Madeira embroidery.

Thank you for this tutorial, searched high and low for a proper tutorial….found it
Here!
Sincerely,
Holly