Crystal Beads – What You Need To Get Started
Why crystal beads?
Do you like to be a bit different to everybody else? Do you like your possessions to say something more than the generic mass-market products that everybody else owns…
…or do you simply like a little more sparkle in your life?
If you can answer yes to any of these questions then you should try crystal beading as your next craft hobby. You can customise nearly everything you own using them!
What can you decorate with crystal beads?
 |
Thanks to the different types of glues and adhesives available you can decorate nearly everything you own with crystal beads, including…
|
You’re really only limited by your own imagination!
For inspiration for your first design, or to find templates to copy, it’s easy to find examples by just searching online.
What type of crystal beads should you buy?
Before you rush out and buy enough crystal beads to create your own rhinestone cowboy outfit, you need to make sure you’re getting the right beads for the job.
Why flat back crystals?
The first check you need to make is that you’re getting ‘flat back’ crystal beads. These are quite self-explanatory, but in the interests of clarity these are crystal beads that have a flat back, which ensures you get a good contact with the item you’re attaching them to.
Hot fix or silver foil backed?
Next, you have to get the right type of crystal beads for the material you’re attaching them to (actually, this refers more to the type of glue they use). This is because some types of crystal beads rely on heat (usually from an iron) to bond your design to the item, while others rely purely on the glue used.
So, if you’re attaching crystal beads to an item with a high melting point (for example, cotton clothing or denim), then you can use ‘hot fix’ crystal beads. When you bond your design with an iron, it won’t melt the item.
However, if you’re decorating an item with a low melting point (for example, synthetic materials) or items which you physically cannot iron (for example, your mobile phone), then you should look for ‘silver foil back’ crystal beads which just use the glue to bond without the need to iron over the final design.
What size?
The last thing to consider is the size crystals you will need. This will depend on both your design, and the size of the item you are decorating.
What other bits and pieces will you need?
Once you’ve decided which type of crystal beads you need for your first project, you’ll need a few simple tools to help create your design. These include…
- Some tweezers to put your crystal beads in place.
- Some scotch tape to secure your template while you’re working on it.
- A clear sheet of glass or plastic so you can keep your crystal beads separate from your template (but still be able to see through it to follow your design).
- An iron and ironing board to bond your design in place (if you’re using hot fix type crystal beads).
- A sheet of Teflon or some other heat resistant sheeting, which you can place over your design while you iron over it.
As you increase the complexity of your designs, or start to apply them to more challenging items, you may need to collect a few more items, but the above should get you started for simple projects like decorating t-shirts or jeans.
Why are you waiting, start crystal beading…
So there you have it, crystal beading in a nutshell. It’s simple, cheap to do and can have really stunning effects.
If you’re looking for a new hobby that helps you create unique items which you can wear, use and enjoy on a daily basis, then you should try crystal beading.


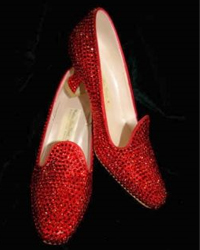
I just love the Red Shoes they are what dreams are made of. Off to check out your website have just started Beading Embellishment and have found a new love. Have quite a collection of Crystals so looks like they may have to come out of their hidy place.
.-= Joy´s last blog ..Boys Embroidery Designs =-.